
Play Framework makes building web applications easier with Java & Scala. It is lightweight and in a web-friendly architecture. Play is a RESTful service by default, and built targeting modern web & mobile. REST stands for REpresentational State Transfer. For a great admiration, Linkedin uses Play framework in their infrastructure.
We are going to create a simple Registration & login mechanism using Play Framework to understand about it. Note that we are not going to create a database or any permanent storages, so that your registration details can be used in login only until the current run is not stopped.
1. Setting up the environment
I've used the following, in developing this login form
- Java Development Kit 1.8.0_121 (http://www.oracle.com/technet
work/java/javase/downloads/ index-jsp-138363.html) - IntelliJ IDEA 2016.3.3 (https://www.jetbrains.com/ide
a/#chooseYourEdition) - Scala plugin 2.12.1 installed (https://www.scala-lang.org/download/)
- Lightbend Activator 1.3.12 (https://www.lightbend.com/act
ivator/download)
Setting path for the Lightbend Activator
Activator is built upon SBT(Scala Build Tool), and can do everything what SBT can do and even more. Build Tools are programs, that can automate the creation of executable applications from source code.
- Select ‘Environment Variables’ from ‘Advanced System Settings’ under My Computer’s properties
- Select the ‘Path’ variable
- Copy the location of activator.bat (mine was “D:\Downloads\typesafe-activator-1.3.12\activator-dist-1.3.12\bin”) and paste it with a semicolon in front of that (when paths other than this are also available in Path variable – eg: JDK)
Starting the Lightbend Activator
- Open Command Prompt
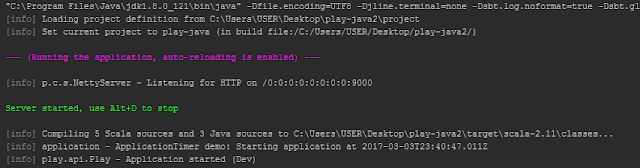
- Type ‘activator’ and wait until the following set of lines appear

- Open ‘activator.bat’ (whose path was copied earlier) and wait for the following set of lines appear, followed by a browser opening with localhost:8888/home URL.
If a browser doesn't open up, look for 'RUNNING_PID' in the same directory where your 'activator.bat' is in, and delete that and repeat step 3.


Activating a seed for project
'Seed' is a basic build, which defines the structure of your application. It can also be compared to a 'Template' kind of thing. We are going to select the seed, so that the Lightbend Activator will structure the application itself.
- Go to 'Seeds', select 'Play Java Seed', Choose a directory and click on 'Create App'

- Wait for the project template to be cloned & the necessary seed related files are downloaded. You will see something similar to the following

- After that has stops growing, Go to 'Code' tab on the left and Click on 'Create IntelliJ Project' and see the build tasks in 'Build' tab


Now the project files will be ready on the specified directory, in which you have created the app. Import them using IntelliJ IDEA, with SBT.

2. Important Packages & files to be considered
Take a look at the following screenshot :

Apart from auto generated files & packages, we should pay more attention to the highlighted
items shown here.
Play framework works in MVC pattern.The ‘controllers’ package can contain the necessary Controllers, and the ‘views’ package can contain necessary user interfaces, and objects.
‘User’ is a Java class, which represents each user, who is signed up and logged in.
‘UserController’ class has all the necessary Business Logic (validations, and etc.), required for the program. This is again, a java class.
‘main.scala.html’ page represents the Front end user interface, written in HTML.
‘routes’
file contains which methods of which class is invoked, when a particular path is used for a method such as GET or POST.
3. Implementation
Each user who is signing up or logging in is considered as
an object of the User class. Each user will be having a username, password,
name and email attributes.
User.java
package views;
/**
* Created by Senthuran Ambalavanar
*/
public class User {
private String username;
private String password;
private String name;
private String email;
public String getUsername() {
return username;
}
public void setUsername(String username) {
this.username = username;
}
public String getPassword() {
return password;
}
public void setPassword(String password) {
this.password = password;
}
public String getName() {
return name;
}
public void setName(String name) {
this.name = name;
}
public String getEmail() {
return email;
}
public void setEmail(String email) {
this.email = email;
}
}
The UserController class has the business logic required for the program.
Comments of the code sections clearly explain what are done in the specific segments
of the code.
A Java Hashmap is used as the database, containing keys as
usernames and values as specific user objects. So that, calling a username would return the user object, to which that username belongs to.
Returnable data is converted into JSON objects. Data interchange formats such as JSON or XML are designed for carrying and storing data. The passed data, can be read and rendered/shown across many interfaces or web pages without much restrictions of converting them. JSON objects are also defined as Key : Value pairs.
*For this program, outputs are also parsed into json
objects, but strings are used since rendering is only about to happen in web
browser
UserController.java
package controllers;
import com.fasterxml.jackson.databind.JsonNode;
import play.libs.Json;
import play.mvc.Controller;
import play.mvc.Result;
import views.User;
import java.util.HashMap;
import java.util.Map;
/**
* Created by Senthuran Ambalavanar
*/
public class UserController extends Controller {
// hashmap functions as the database
// key : username
// value : particular user object
Map<String, User> db = new HashMap<>();
/**
* finds the user with the given username and return the user object
* @param username
* @return found user object
*/
public User findUser(String username){
// find user from the hashmap, who is containing the given username as the key
User user = db.get(username);
return user;
}
/**
* returns validation status, validated with provided username and password
* @param username
* @param password
* @return validation boolean status
*/
public boolean validateUser(String username, String password){
// find the user with the given username
User user = findUser(username);
// return status of username + password combination
return (password.equals(user.getPassword()));
}
/**
* gets the complete user object after validating
* @param username
* @return user object as Result
* * Rendered as String to the browser, but compatible as json object (code is implemented but not used)
*/
public Result findUserByUsername(String username, String password) {
// json object which will have the object, parsed into
JsonNode json;
// string to be returned at end
String ret;
// user validation
if(validateUser(username,password)){
// user validation successfull
// get the found user
User foundUser = findUser(username);
// convert the found user as json object
json = Json.toJson(foundUser);
// string message to show the user details
ret = "Login Success!\n\nHello "+foundUser.getName()+"!\n\nUsername :"+foundUser.getUsername() +"\nEmail : "+foundUser.getEmail();
}else{
// user validation not successful
// string message to show error
ret = "Login failure!\nPlease check your credentials";
// convert the found user as json object
json = Json.toJson(null);
}
// return the string
return ok(ret);
}
/**
* signs up a user by adding the user details into the hashmap : db
* @param username
* @param password
* @param name
* @param email
* @return created instance of user
*/
public Result saveUser(String username, String password, String name, String email) {
// the signed up user object
User user = new User();
// set user details
user.setUsername(username);
user.setPassword(password);
user.setName(name);
user.setEmail(email);
// put the user object into the hashmap
db.put(username,user);
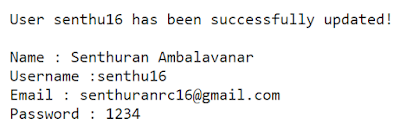
// user creation success message
return created("User "+user.getUsername()+" has been successfully updated!\n\nName : "+user.getName()+"\nUsername :"+user.getUsername() +"\nEmail : "+user.getEmail()+"\nPassword : "+user.getPassword());
}
}
This file is responsible for defining all the routes, used by this application. For example, which methods are called in certain GET or POST requests.
# Routes
# This file defines all application routes (Higher priority routes first)
# ~~~~
# An example controller showing a sample home page
GET / controllers.HomeController.index
# An example controller showing how to use dependency injection
GET /count controllers.CountController.count
# An example controller showing how to write asynchronous code
GET /message controllers.AsyncController.message
# Map static resources from the /public folder to the /assets URL path
GET /assets/*file controllers.Assets.versioned(path="/public", file: Asset)
# login a user with parameters
GET /myLogin/login/:username/:password controllers.UserController.findUserByUsername(username: String, password: String)
# signup a user with parameters
GET /myLogin/signup/:username/:password/:name/:email controllers.UserController.saveUser(username: String,password: String, name: String, email: String)
Main.scala.html
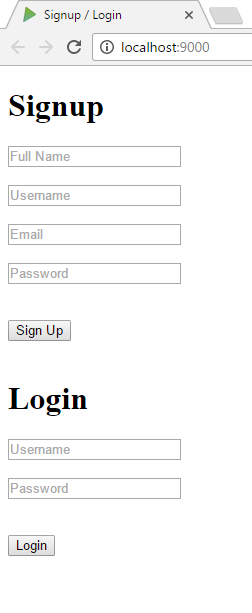
This page contains two segments : one for Signup and one for
Login. GET method is used to send data, acquired from the user through input
text boxes. Javascript functions are used to be called by the buttons when a
button click occurs, that get the values from text fields and passes it through
URL (GET request)
@*
* This template is called from the `index` template. This template
* handles the rendering of the page header and body tags. It takes
* two arguments, a `String` for the title of the page and an `Html`
* object to insert into the body of the page.
*@
@(title: String)(content: Html)
<!DOCTYPE html>
<html lang="en">
<head>
@* Here's where we render the page title `String`. *@
<title>@title</title>
<link rel="stylesheet" media="screen" href="@routes.Assets.versioned("stylesheets/main.css")">
<link rel="shortcut icon" type="image/png" href="@routes.Assets.versioned("images/favicon.png")">
<script src="@routes.Assets.versioned("javascripts/hello.js")" type="text/javascript"></script>
</head>
<body>
<script>
function signup(){
var fname = document.getElementById("fname").value;
var uname = document.getElementById("uname").value;
var email = document.getElementById("email").value;
var password = document.getElementById("password").value;
// redirect
window.location = "http://localhost:9000/myLogin/signup/"+uname+"/"+password+"/"+fname+"/"+email;
}
function login(){
var unameLogin = document.getElementById("unameLogin").value;
var passwordLogin = document.getElementById("passwordLogin").value;
// redirect
window.location = "http://localhost:9000/myLogin/login/"+unameLogin+"/"+passwordLogin;
}
</script>
@* And here's where we render the `Html` object containing
* the page content. *@
@* @content *@
<h1>Signup</h1>
<input type="text" id="fname" size="20" placeholder="Full Name"><br><br>
<input type="text" id="uname" size="20" placeholder="Username"><br><br>
<input type="email" id="email" size="20" placeholder="Email"><br><br>
<input type="password" id="password" size="20" placeholder="Password"><br>
<br>
<br>
<button onclick="signup()">Sign Up</button>
<br><br>
<h1>Login</h1>
<input type="text" id="unameLogin" size="20" placeholder="Username"><br><br>
<input type="password" id="passwordLogin" size="20" placeholder="Password"><br>
<br>
<br>
<button onclick="login()">Login</button>
</body>
</html>
4. Running the program
Running the program in IntelliJ IDEA would run this app as a
Play2 Application : which opens up the ‘main.scala.html’ in the browser, with
the URL localhost:9000
And that's it. Here are some screenshots of the program, up and running
Welcome UI
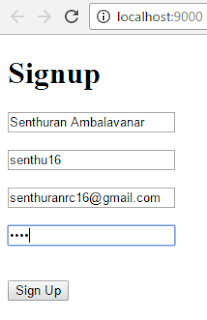
Signing up a user
Logging in with wrong password


Logging in with correct password

You can find the complete project folder in my github repository. This includes TypeScript in simple front-end validations.
Awesome one bro... keep it up
ReplyDeletewell explained, very useful !
ReplyDeleteSimple and Accurate Explanation! Thanks!
ReplyDeletenice article
ReplyDeleteExcellent explanation. got good knowledge about play framework
ReplyDeleteGood tutorial.. keep it up!
ReplyDelete